How to speed up a WordPress site instantly (guide on speed optimization in 2023)
How to speed up the pagespeed of your WordPress site, it doesn’t matter if you have an existing or new site. Page speed is important nowadays, no explanation needed. We are going to explain how to speedup your WordPress in a 6 easy steps using the best practices.
We will use only 4 plugins and Cloudflare:
- Async javascript
- Asset Cleanup
- WP Fastest Cache/LSCache
- EWWW Image Optimizer
- Cloudflare free plan
We will use WordPress 5.5.1 and the Divi theme.
How to optimize a WordPress website with only a view modifications
We will show you how to optimize a WordPress website with only a view modifications and use of free plugins for instant pagespeed optimization. Your website will be faster after following our instructions. We will use a test environment on a test server and the Divi theme to conduct our experiment.
When we build websites in WordPress, we do it with speed and security by design. It means that we are careful what plugins to use and install a WAF firewall immediately. We try to convince clients to use Cloudflare because it’s free and good. It not only speed up your website it also secures it. Here is a guide on Cloudflare firewall rules: Cloudflare firewall rules for WordPress
New or existing website
It doesn’t matter if you have a new or an existing WordPress website the steps are the same. The difference with a new site is that you can choose the best hosting environment for your website for optimum speed.
Good and fast web hosting
One of the best hosting providers I have tried was Kinsta with amazing speed, excellent instant support and a good user interface, easy to use.
Virtual Private Server
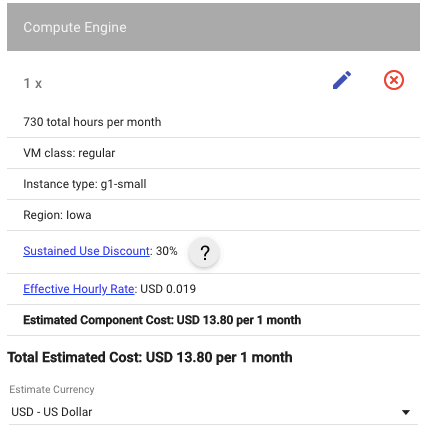
If you are good with linux and servers then you should consider your own VPS or Managed VPS if you do not want to do system administration. We recommend a VPS or dedicated server only if you have a high traffic or resource intensive website. However a g1-small with 1 vCPU (shared) and 1.7 GB RAM on GCP costs about $13,80 per month and is suitable for a normal business website. We do not recommend the f1-micro server for production environments although it is free for ever when deployed in the US.
Our test environment (server)
For our test environment we will use a GCP one-click install of an Openlitespeed web server on a f1-micro instance with 1 vCPU (shared) and 0.6 GB RAM. We will use WordPress version 5.5.1 as this is the current version and lazy loading is added & Jquery migrate is depreciated. We will use the Divi theme, a widely used and loved theme from Elegant Themes.
We are not affiliated to Elegant Themes or Divi and if you purchase something by clicking a link we might get a commission.
Remark: We will turn of LSCache later to see the difference with a other caching plugin.
We then can see the difference with LSCache and WP-Fastest Cache
Here is a guide on setting up a Openlitespeed server with WordPress on GCP: How to install openlitespeed on GCP console
For the homepage we are going to test we cloned our homepage made in the Divi theme including images to represent a real website.
Let’s start optimizing
We will start with all defaults in our setting and optimize step by step checking the pagespeed loading time.
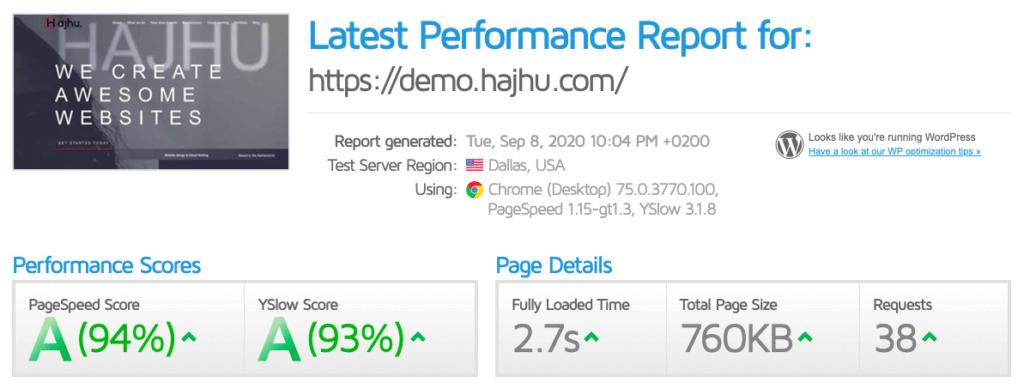
Pagespeed score without optimization
As you see the fully load times between 3.6s and 5.5 s is not bad at all, right out of the box on a Openlitespeed Web Server, using the Divi theme.

Step 1: Check all defaults pagespeed optimization settings
Are you using or have:
- PHP 7.4 or higher?
- HTTP/2 SSL TLS 1.3?
- InnoDB for MySQL tables and not MyISAM?
- GZIP compression?
- Cache-Control and Expires Headers (leverage browser caching)?
- Database optimization plugin like Wp Optimize?
In our case we checked those settings and everything is ok, except for Defer parsing of JavaScript. That means our server already is optimized and GZIP and leverage browser caching is on.
Step 2: Activate and configure Async Javascript
Activate and configure Async Javascript, choose defer except for JQuery.
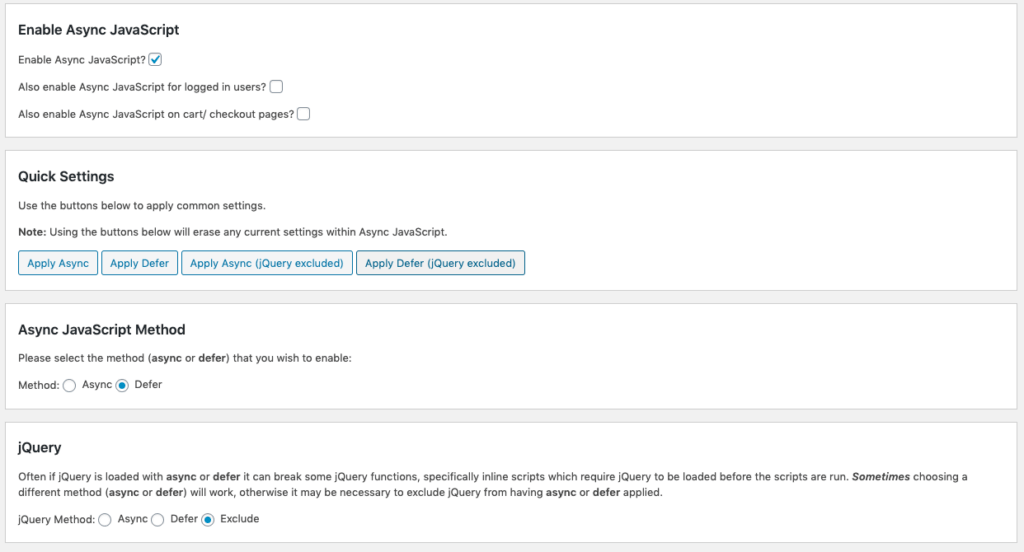
After activating Async Javascript the loading times went down between 2.5s and 2.7s
Step 3: Activate and configure Asset Cleanup
Activate and configure Asset Cleanup, be sure not to enable minify, combining or lazy load. WordPress now lazy load images by default. Combining is not a best practice anymore and Cloudflare will minify for you.
Turn off all assets from loading that you do not use, this article is out of scope on how to configure this/a plugin, keep in mind our recommendations regarding minify and lazy loading. Never put the same configuration in different plugins, just configure that particular setting in only one plugin.
Just configure in settings: sitewide common unloads & HTML source cleanup! You can finetune in step 6.

After activating and configuring Asset Cleanup we had page loading times between 2.1s and 1.8s. The total page size and number of requests went down due to not loading unnecessary bloat.

Step 4: Activate a caching plugin
Activate a caching plugin to serve cached pages that will speed up your website.
WP Fastest Cache
Only configure the settings as here under, do not minify as Cloudflare will do that for you. We choose this caching plugin because GTMetrix is recommending it and it is free. A better Plugin would be WP Rocket what is comparable to LSCache.
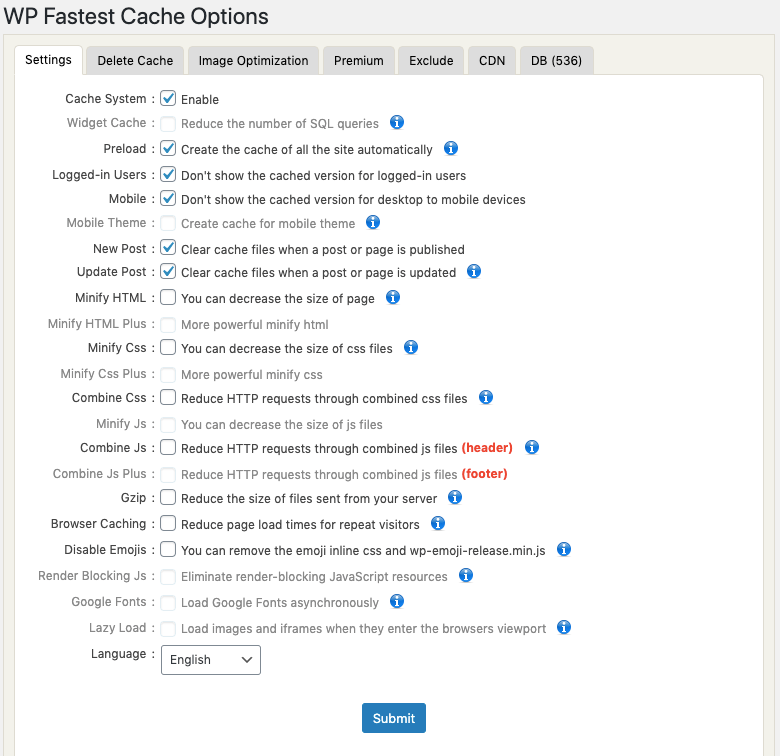
With WP Fastest Cache we reached page load times between 1.7s and 1.0s.
LSCache
LsCache is a plugin comparable to WP Rocket, the difference is that it is free, the issue is that you need an Openlitespeed web server. Both plugins can generate Critical CSS to speedup the above the fold (css needed to generate the first part of a page you will see).
We will use all the default settings of LSCache as distributed by the one click image on GCP. After activating Lightspeed cache the page loading times where between 1.2s and 1.6s
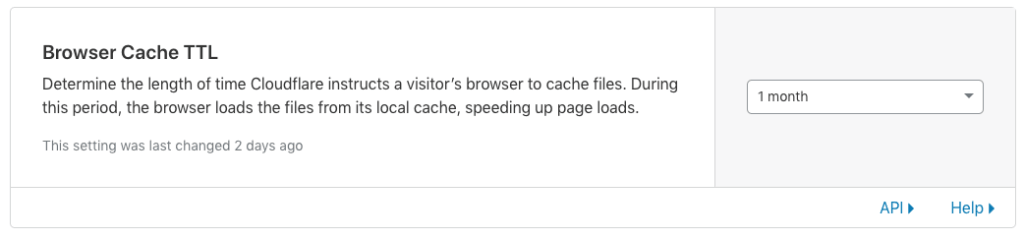
Step 5: Activate and configure Cloudflare
Put browser cache to 1 month or 1 year, this is what leverage browser caching is, you can activate it also by editing your .htaccess file with expiry headers.
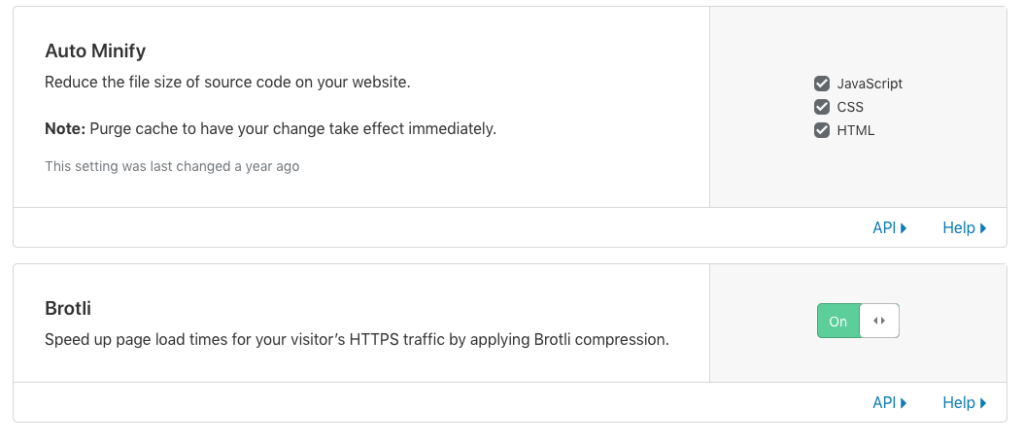
Enable auto minify and Brotli in speed settings.
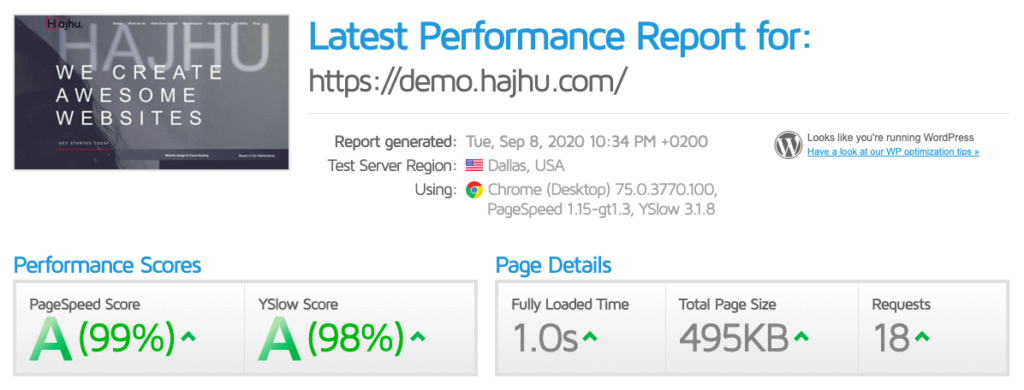
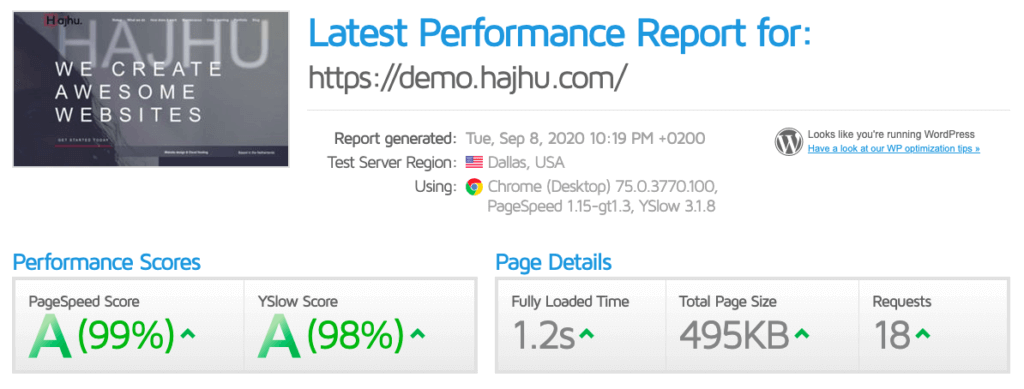
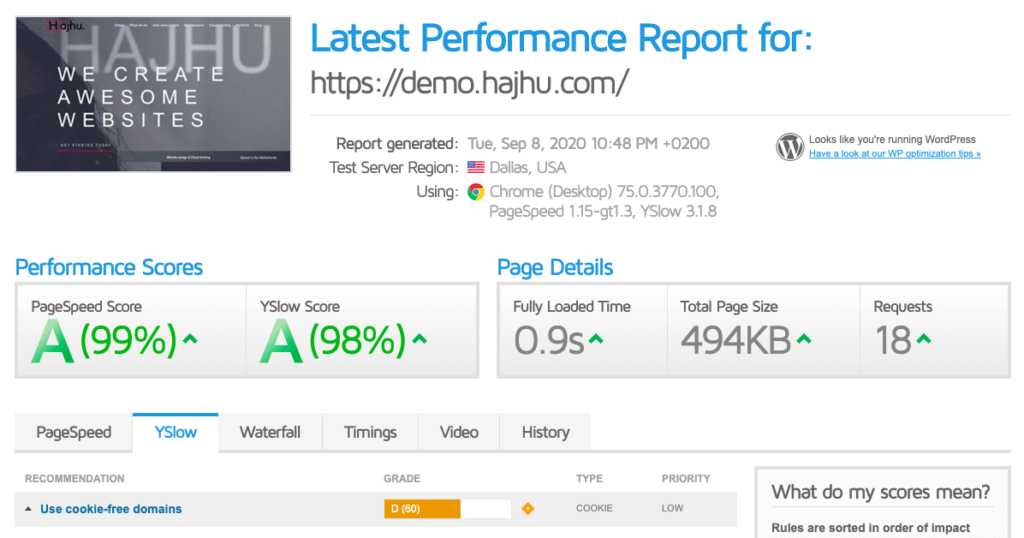
After activating Cloudflare we brought the page loading times down to about 0.9s and 1.1s with Litespeed Cache (LSCACHE).

With WP Fastest Cache we reached to page loading times between 1.5s and 1.0s
Step 6: Fine tune and optimize images
Image optimization is a must because they are big and slows down your pagespeed. There are some good free plugins to use like WP-Smush. We will use EWWW Image Optimizer Cloud because we want our images compressed with a premium service and this plugin can generate and use WebP images that speed up your website even more. Another trick is to use the compressed images offered by speed testing services like GTMetrix and Pagespeed insights.
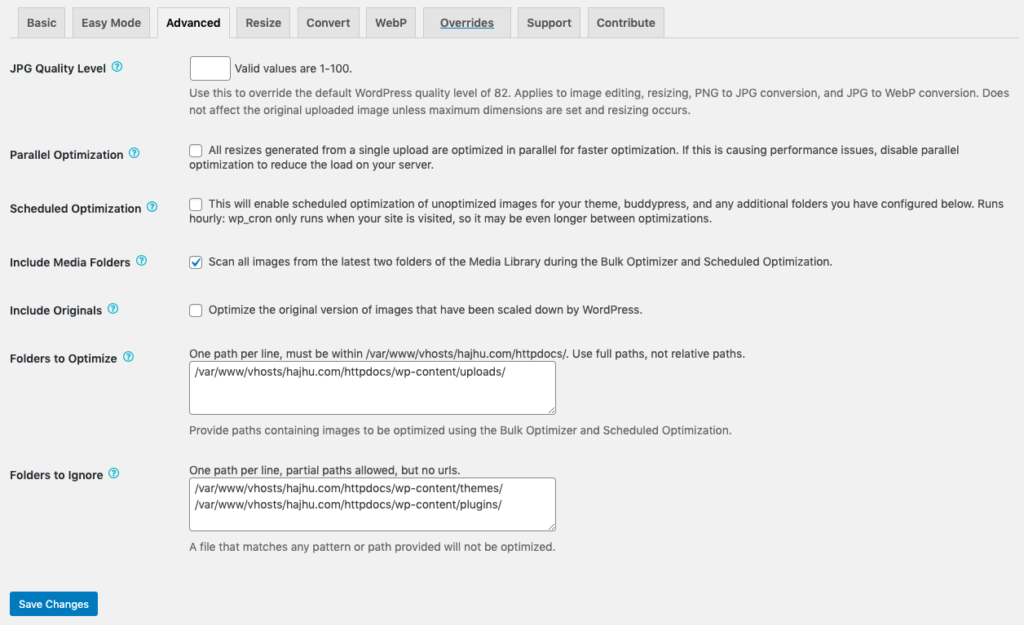
We configured EWWW Image Optimizer Cloud with the default settings and activated WebP images and all premium optimization services. We excluded /wp-content/themes/ and /wp-content/plugins/, we included /wp-content/uploads as the directory to scan for bulk optimization.
After doing a bulk optimization and turning on WebP images we should test again. Our page was already image optimized so the difference is nothing. As each situation and website is different you need different configurations.
Now is time for fine tuning, we use GTMetrix and we stick with GTMetrix, it will drive you nuts using to many tools at once. By fine tuning I mean you look at the waterfall to see which files are loaded and how long it took. Often you will meet images that can be optimized by re-cutting/scaling them and compress them again until they are exactly big enough for the purpose you used them.
I wouldn’t border optimizing further, the most important thing is having a fast web server and following those simple steps.
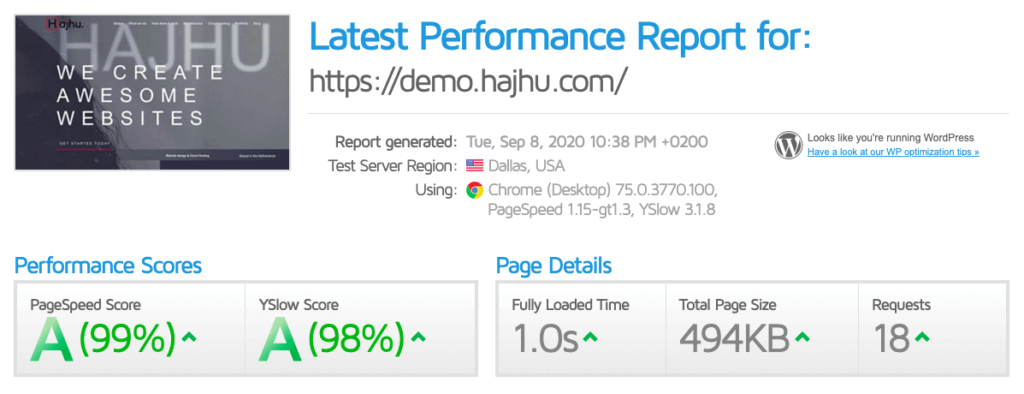
Finally our configuration with WP Fastest Cache reached a record pagespeed loading time of 0.9s.
What about Cookie-free domains?
You could use a CDN like Key CDN as other guides also , I do not worry because Cloudflare is doing it job fine, the only issue is that they do send a 1kb cookie. It is so small it would not affect your pagespeed.
The workaround you could use is making a complete new domain name, using a subdomain as the wp-content directory and make it cookieless. You can modify your wp-config.php to point wp-content to that subdomain. Unless your domain is running on a subdomain like www, then there is no cookie set on your top level domain.
You can modify wp-config.php with those lines:
define("WP_CONTENT_URL", "http://static.domain.com");
define("COOKIE_DOMAIN", "domain.com");
Conclusion
LSCache VS WP fastest cache
At first I thought that LSCache or Litespeed Cache would outperform WP fastest cache. Litespeed Cache is slightly faster due to that it also use object caching like Memcached or Redis. It is integrated and made for use with Lightspeed web servers only, You cannot use it with another web server like Apache or NGINX.
3x faster
We went down from an average fully page loading time of 2.7s to 0.9s, you do the math. Almost 3x faster then before optimizing. We just used 3 plugins that helped gaining the most pagespeed.
Good hosting
Having good hosting or better a server close to your visitors that is fast is the most important. Using caching and reduce unnecessary scripts with Asset Cleanup is a real plus. You can also block scripts from loading per page or post , pages sitewide or posts sitewide. A good understanding of the tool is a must to finetune your site.
Do it yourself VPS: Sign Up for Linode
Managed VPS: Cloudways
Managed WordPress hosting: Fast WordPress Hosting
Theme is also important
A good and speed optimized theme is also important, we used the Divi theme and there are lighter themes out there so the pagespeeds must be able to reach pagespeed loading times under 1 second.
Image optimizing
Do not forget image optimizing, sooo important…
Happy optimizing!
More resource: Divi Page Speed Performance Update august 2021 version: 4.10.3